Friday 7 April 2017

Week 10


 In the tenth week of the term, I and my team had to present the final version of the game. In the presentation, we had to approach ideas in our presentation like what went good, what went bad and future plans for the game. As a summary, I can say that the things which went well in our project were:  the project management (most of the teammates managed to come to our weekly meetings), the design quality of the game (our game was appreciated for creating a realistic atmosphere) and the puzzles of the game worked almost perfect. Unfortunately, we had some issues as well, some of the teammates were not able to come when the team needed their help which slowed down the process of creating the game. Also, one of the biggest problems within the game was the OVR First Person Controller which affected the gameplay. Regarding the usability test, we managed to ask some of our acquaintances to play the game and give us some feedback. The results, in general, were good but we have received some complaints regarding the first person controller.

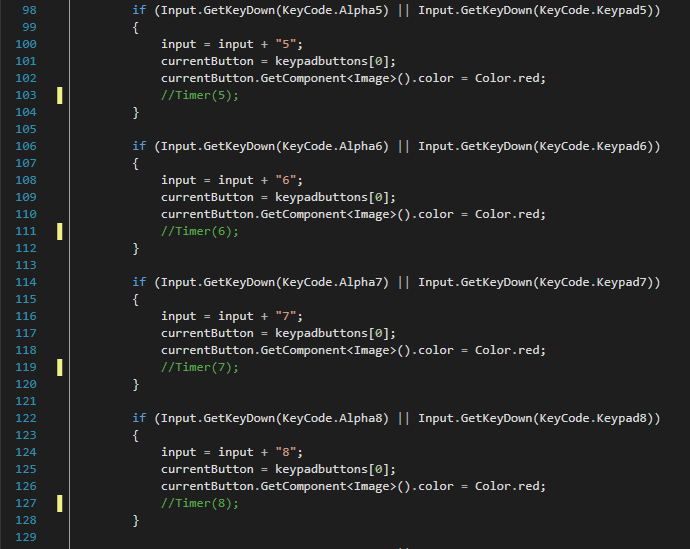
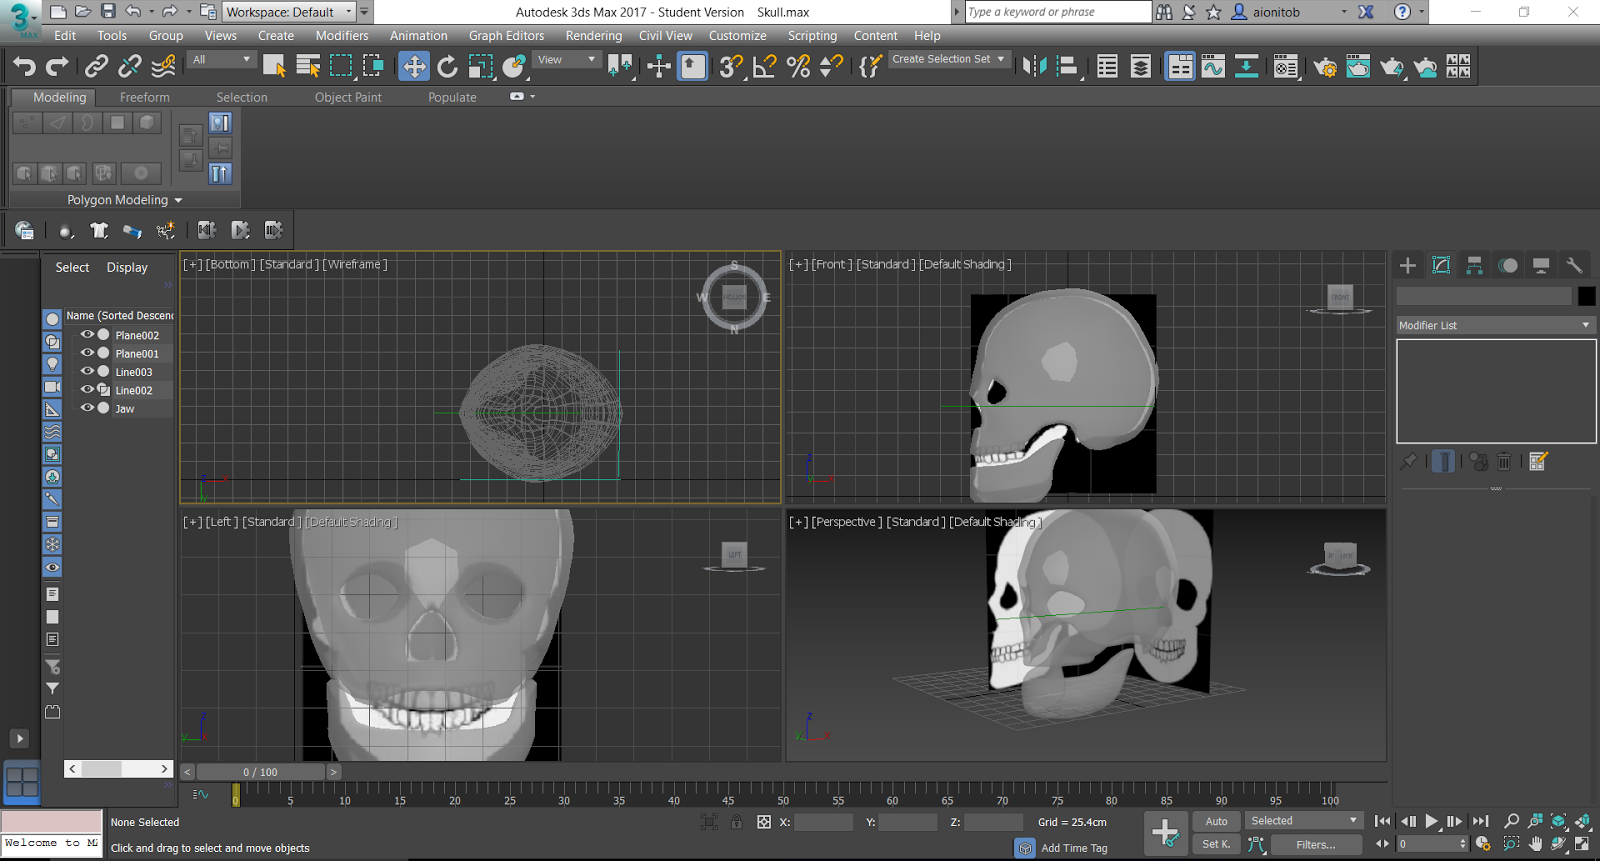
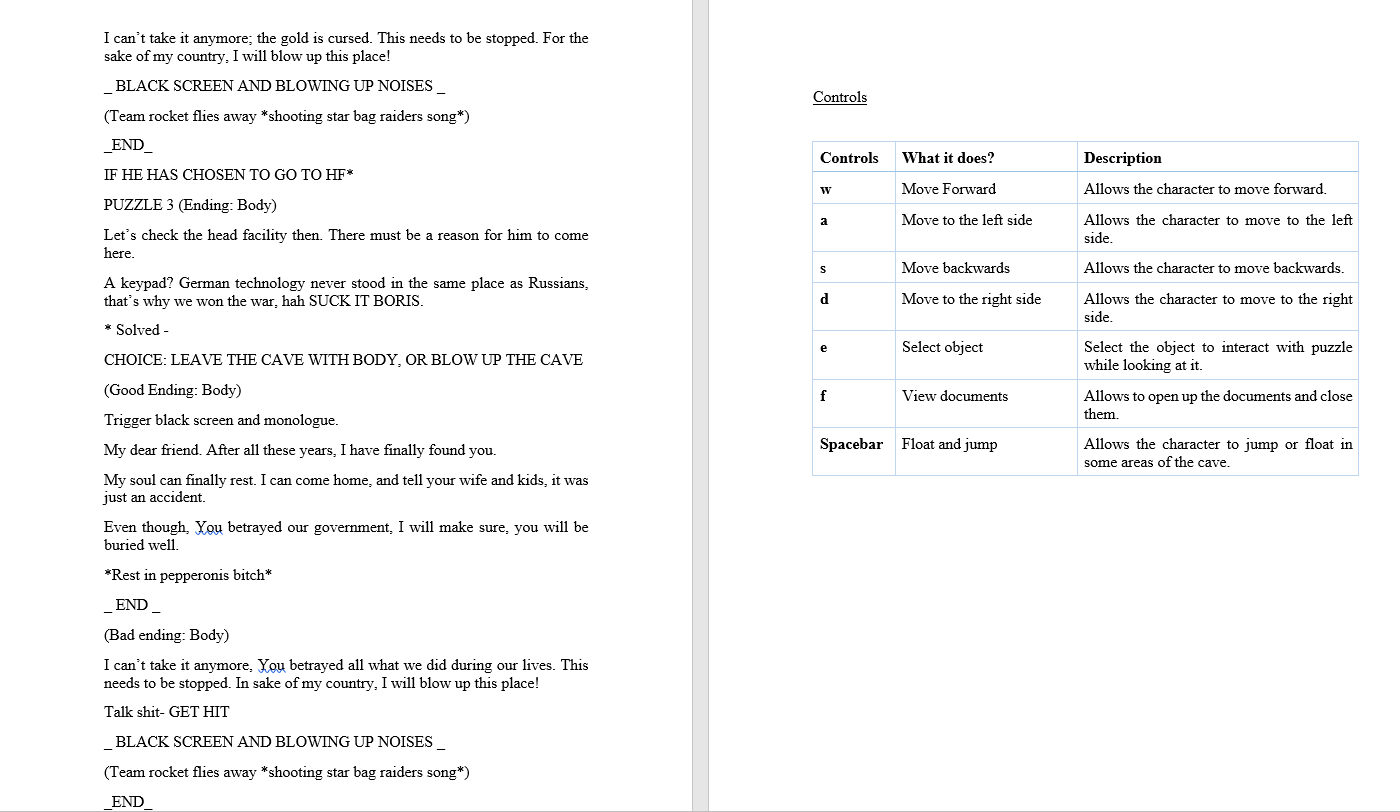
Here can be seen some screenshots from the game and the main menu:


 The background of the main menu is black because a video is supposed on the background. Here the video can be seen:


Week 8 & 9


 In the eighth and ninth week, I have worked at scripting the third puzzle, basically coding the keypad to open the door when the player enters the correct password. Besides that, I have 3D modelled a skull, using the spline modelling technique, for one of the endings of the game. 

 Pictures with the script for the keypad:


 The purpose of the script was to trigger the metal door after the player inserts the right password. The script is triggered when the player enters the box collider which was attached to the keypad.


 After the player enters the box collider and he interacts with the keypad with the help of the key E, a canvas with a green keypad will pop up. In order to open the gate, the player will have to type the passcode.


 After I have finished working for the third puzzle in the game, I have started working for the skull. Here can be observed some pictures with representing the timeline of designing the skull:


 In the ninth week, I had to send an alpha version of the game in Brazil, together with a usability questionnaire which the tester was supposed to complete after he played the game. The questionnaire consists of a series of questions about the gameplay, a task list which the player is supposed to do in order to answer the questions. The document consists of other things as well which can be seen in the following images:


 Unfortunately, we have not received any feedback from the testers.


Thursday 6 April 2017

Week 6 & 7


 In the sixth and seventh week, I have continued my work regarding 3D modelling. I have modelled props for the puzzles designed in the game: metal door, metal gates and a keypad.


 This is a picture of the gate used for the second puzzle in the game. The gate has been done using the box modelling method and for texturing I have used a free texture.


 The following video will play the animation. To animate the gates I have attached a pivot to each gate.


 In the next image is shown a 3D model of a gate which has been used for the first and the third puzzle. I have used the box modelling technique to model the gate and I have applied a free metal texture.


 A video with the animation of the gate:


 The last thing which I have done in the seventh week was to design a keypad for the third puzzle, to design it I have used the same technique as for the gates, box modelling. Also to colour the "cancel", "clear" and "enter" button I applied some texture on them, using the Material Editor window in 3Ds Max, textures which I have done in Adobe Photoshop.


 The texture which I have applied on the keypad:


 The website which I have used to search for textures was: http://www.textures.com/

Week 4 & 5


 In the fourth week of the term, our roles in the team were defined and I was assigned by my team to 3D model and animate a fish. In the fifth week, I have started to work on the 3D model which I have managed to finish in the sixth week because in the fifth week was mainly assigned for the phase tests.


 This is a picture of the model after I modelled the shape of the fish. The 3D model of the fish was realised using the box modelling method. The original photo which I have used as a model for the 3D model was a picture with a piranha fish:


 The following picture illustrates the final model of the fish, textured and animated using the bone animation method. The texture which I have used for the fish is the following, it is a free texture which I took from Google images:


  The following video will show how the bone animation works:


Week 3


 In the third week, the lecturers have shown how to organise the code using C# classes and collections, which helps us to write better code and reduce the number of bugs in our code. After we got introduced in we were asked to create some scripts for a sample project, called Crazy Cube, which was uploaded by our lecturers on Moodle.

 Pictures with the scripts:


 These two pictures represent the script for the colour gun. I was supposed to create a script which will allow the cube to shoot some paintballs of different colours. The idea of the code is to access the inventory script to check if there is enough "substance" of a colour to shoot. The script checks if there is enough colour and if the "paint" variable is different than "null" than the cube will be able to shoot a random colour.


 In this script, I have created a class called "Inventory", the class which the "Gun" script is inheriting the inventory for colours. In the script, I have created a "list" for the colours of the paintballs and a "dictionary" for storing them and accessing them when needed.


 This script was created to reload the green colour and to add it to the "inventory".


 This script is supposed to show a message with the colour of the next paintball which is about to be shot.


 This picture is illustrating the movement script for the cube.


  The role of this script is to change the shape of the paintball after it collides with the ground.

Tuesday 4 April 2017

Week 2


 In the second week of the term, we talked about the UI design and difference between different types of UI like non-diegetic, diegetic, meta, spatial. After we got introduced to these different type of UI, the lecturers asked us to design a paper prototype for our game's UI. The type of UI which I opted for was a simple, non-diegetical one. A non-diegetical user interface is an UI which is generally hovering over the gameplay, it is not integrated into the gameplay. 

 A picture with the paper prototype:


Week 1


 In the first week of the second term, we were introduced to the second ALL project and new groups were created. The main objective of the project is to create a virtual reality interactive story in Unity utilising the Oculus Rift. The game is supposed to have only one character which is supposed to be the player character and the gameplay needs to be in the first person view, also the game is supposed four different endings. With the assignment being given by our lecturers, I and my team brainstormed some ideas and created the story for our game entitled Deep Cave Terror: Hranice Abyss Case. The story of the game takes place in modern times, where the main character (Vasiliy Georgiev), which a scuba diver, is searching for his friend (Boris Jelnikov), which went to explore an underwater cave in the Czech Republic. Once reaching the Hranice Cave, Vasiliy discovers the reasons which made Boris interested of the underwater cave. To make the game more interesting and to expand the gameplay we decided to add three puzzles. Depending on how the player solves the puzzles the game will have a different ending.

 A picture with the branches of the story: